Creating a Dragon Themed Cake is an exciting and rewarding endeavor that combines creativity, skill, and a touch of magic. Whether you’re planning a birthday party, a fantasy-themed event, or simply want to indulge in the art of cake decorating, a dragon-themed cake can be the centerpiece of any celebration. Dragons symbolize strength, mystery, and wonder, making them perfect for adding drama and excitement to your dessert table. In this comprehensive guide, we’ll walk you through every step of crafting a stunning dragon-themed cake, from choosing the right design to bringing your vision to life with intricate details. By the end of this article, you’ll feel confident and inspired to create your own masterpiece.
Introduction: The Allure of the Dragon Themed Cake
Dragons have captivated human imagination for centuries, appearing in myths, legends, and modern-day stories alike. From the fire-breathing beasts of medieval tales to the majestic creatures of contemporary fantasy novels, dragons embody power, beauty, and adventure. Translating these mythical creatures into edible art offers endless possibilities for creativity. A Dragon Themed Cake isn’t just a dessert—it’s a statement piece that sparks awe and admiration.
This type of cake appeals to all ages, whether it’s for a child’s birthday party, a themed wedding, or even a casual gathering among friends who share a love for fantasy worlds. The process of creating such a cake allows bakers to explore their artistic side while experimenting with textures, colors, and designs. With careful planning and attention to detail, you can craft a cake that not only tastes delicious but also looks like it stepped straight out of a storybook.
In this guide, we’ll break down the entire process into manageable steps, ensuring that even beginners can achieve professional-looking results. Let’s dive into the world of dragon-inspired baking and discover how to make your very own stunning Dragon Themed Cake .
Part 1: Planning Your Dragon Themed Cake Design
Before diving into the actual baking and decorating, it’s essential to spend time planning your Dragon Themed Cake design. This stage sets the foundation for everything else and ensures that your final product aligns with your vision.
Choosing the Right Theme
The first step is deciding on the overall theme of your cake. Are you aiming for a fierce and fiery dragon, complete with scales and glowing eyes? Or perhaps a whimsical and friendly dragon, adorned with pastel colors and playful features? Consider the occasion and the audience when settling on a theme. For instance, a children’s party might call for a cartoonish dragon, while a more formal event could benefit from a sophisticated, lifelike design.
Sketching Your Design
Once you’ve chosen a theme, sketch out your ideas on paper. Visualizing your concept beforehand helps prevent mistakes during the execution phase. Include details such as the dragon’s pose (flying, coiled around the cake, or resting atop it), color scheme, and any additional elements like flames, treasure chests, or mountains. If you’re unsure where to start, browse online tutorials or reference images for inspiration.
Selecting the Cake Shape and Size
The structure of your cake plays a crucial role in achieving the desired effect. Decide whether you want a tiered cake, a single-layer round or square cake, or something unconventional like a castle-shaped base. Keep in mind the number of servings needed and the stability required for complex decorations. A sturdy base will ensure your dragon stays securely perched without toppling over.
Gathering Supplies and Tools
To bring your design to life, gather all necessary tools and supplies ahead of time. Essential items include fondant, modeling chocolate, food coloring, piping bags, sculpting tools, and edible paints. Additionally, consider using structural supports like dowels or cake boards to reinforce multi-tiered cakes. Having everything ready before you begin saves time and reduces stress during the decorating process.
Part 2: Baking and Assembling Your Dragon Themed Cake
With your design planned and materials gathered, it’s time to move on to the next phase: baking and assembling your Dragon Themed Cake .
Baking the Perfect Cake Layers
Start by preparing your favorite cake recipe. Vanilla, chocolate, red velvet, or even spice cake work well depending on your flavor preferences. Ensure each layer is baked evenly and cooled completely before stacking. Uneven layers can lead to instability, which is particularly problematic when working with heavy decorations.
If you’re making a tiered cake, bake each tier separately and level them carefully to create smooth surfaces. Use a serrated knife or a cake leveler to trim off any domed tops. Once leveled, brush each layer with simple syrup or flavored glaze to keep the cake moist and enhance its taste.
Building a Stable Structure
For larger or multi-tiered cakes, stability is key. Insert dowels or straws into the lower tiers to support the weight of the upper layers. Place a cake board between each tier to distribute the load evenly. Secure the tiers together with a small amount of frosting or melted chocolate to prevent shifting during transport or display.
Adding Crumb Coating and Frosting
Apply a thin layer of frosting, known as a crumb coat, to seal in crumbs and provide a smooth surface for decorating. Chill the cake in the refrigerator for about 15–20 minutes to set the crumb coat. Afterward, apply a thicker layer of frosting, smoothing it out with a spatula or bench scraper. This creates a blank canvas for your dragon-themed decorations.
Part 3: Decorating Your Dragon Themed Cake
Now comes the most exciting part—decorating your Dragon Themed Cake ! This is where your creativity truly shines, and every detail matters.
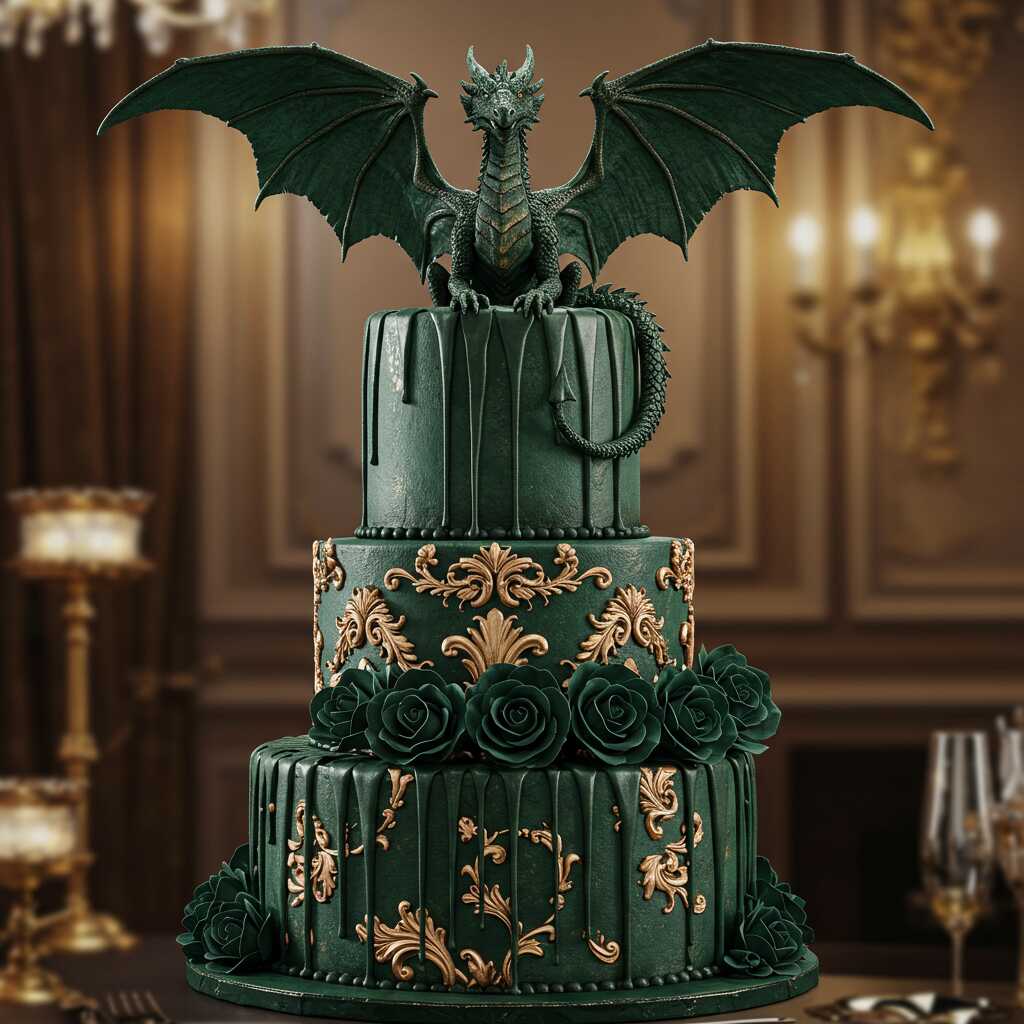
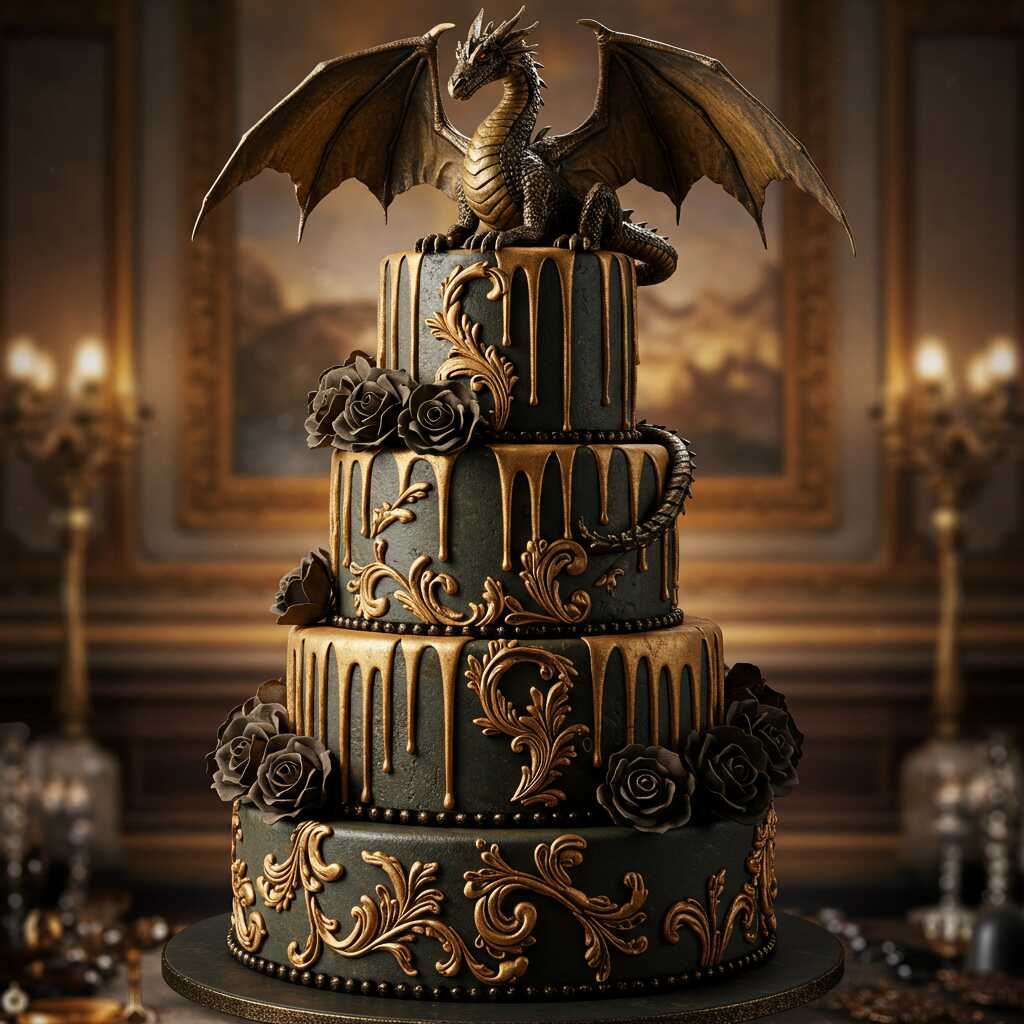
Creating the Dragon Sculpture
Begin by shaping your dragon using fondant or modeling chocolate. These materials are pliable and easy to mold, making them ideal for intricate designs. Start with basic shapes for the body, head, wings, and tail, then refine the details. Use sculpting tools to add texture, such as scales, spikes, and facial features. Pay close attention to proportions to ensure your dragon looks balanced and realistic.
For added realism, mix different shades of food coloring to achieve gradient effects. For example, blend red, orange, and yellow hues to mimic fiery tones, or use greens and blues for a cool, mystical look. Edible dusts and luster powders can highlight specific areas, giving your dragon a shimmering, lifelike appearance.
Advanced Techniques for Sculpting the Dragon
To take your dragon sculpture to the next level, consider employing these advanced techniques:
Layering Colors for Depth
Instead of using a single shade of fondant or modeling chocolate, layer multiple colors to create dimension. For example, if your dragon has green scales, mix shades of emerald, lime, and moss green to mimic natural variations in lighting and shadow. Blend these colors seamlessly using a soft brush or sponge to achieve a gradient effect.
Adding Texture with Tools
Texture is key to making your dragon look realistic. Use specialized sculpting tools or household items like toothpicks, knitting needles, or even a garlic press to add fine details. For instance:
- A ball tool can indent areas to form eye sockets or nostrils.
- A veining tool can carve lines along the wings to resemble delicate membranes.
- A fork or comb can create scale-like patterns across the dragon’s body.
Creating Realistic Eyes
The eyes are often the focal point of any dragon design. To craft lifelike eyes, use edible gel paste or paint to add depth and shine. Start with a white base, then layer on pupils, irises, and highlights using different shades of black, brown, gold, or green. Add a tiny dot of white icing or edible glitter at the corner of each eye to simulate light reflection, giving them a lifelike sparkle.
Incorporating Movement and Pose Dynamics
A well-designed dragon should convey motion and personality. Think about how the dragon interacts with the cake—does it appear to be flying, lounging, or guarding treasure? Adjust its posture accordingly:
- For a flying dragon, curve the body slightly upward and extend the wings outward. Use wire supports wrapped in food-safe tape to keep the wings stable.
- For a resting dragon, curl the tail around the cake or drape part of its body over the edge of the tiers for a relaxed, natural pose.
- To suggest tension or aggression, arch the neck and open the mouth wide, revealing sharp teeth made from white fondant or gum paste.
Crafting Flames That Wow
Flames are a quintessential element of any dragon-themed creation. While basic flame shapes are effective, here are some ways to make them stand out:
- Gradient Flames: Roll out strips of red, orange, yellow, and white fondant, then twist them together before shaping them into flames. Blend the edges gently to avoid harsh transitions between colors.
- Edible Glitter Effect: Dust clear edible glitter or pearl dust over the flames to give them a fiery shimmer. Alternatively, use an airbrush tool with metallic shades for a more professional finish.
- Smoke Trails: Create wisps of smoke using gray or silver fondant rolled thinly and shaped into swirls. Attach these behind the flames to enhance the illusion of heat and movement.
Enhancing the Cake Base
The base of your Dragon Themed Cake provides context and enhances the overall theme. Consider these creative ideas for designing the landscape:
- Mountainous Terrain: Use buttercream frosting to pipe jagged peaks around the bottom tier. Dust cocoa powder or dark food coloring over the peaks to create a rocky texture. Insert edible rocks or pebbles made from hardened fondant for added realism.
- Lush Forests: Craft miniature trees using pretzel sticks as trunks and green fondant leaves. Arrange them around the cake to evoke a mystical woodland setting.
- Treasure Trove: Scatter edible gold coins, pearls, and jewels around the base to depict a dragon hoarding its riches. You can also mold a treasure chest from fondant and fill it with colorful candy “gems.”
Troubleshooting Common Challenges
Even experienced decorators encounter challenges when working on complex designs. Here are solutions to common issues:
- Cracking Fondant: If your fondant cracks while shaping the dragon, knead it with a bit of shortening or vegetable oil to restore elasticity. Apply a thin layer of water to smooth out any imperfections.
- Sagging Wings: Thin wings may droop under their own weight. Reinforce them with thin wires inserted into the fondant before shaping. Ensure the wires are food-safe and fully encased in the material.
- Frosting Smudges: When applying colored accents, frosting smudges can ruin clean lines. Keep a damp cloth nearby to wipe away mistakes immediately. For precision work, use small brushes instead of piping bags.
Incorporating Interactive Elements
For an extra touch of whimsy, consider adding interactive elements that engage your audience:
- Light-Up Features: Place battery-operated LED lights inside hollowed-out portions of the cake (such as the dragon’s mouth or chest) to create glowing effects. Ensure all electrical components are safely sealed and do not come into contact with the cake itself.
- Removable Parts: Design certain elements, like the dragon’s tail or individual flames, to be removable. This allows guests to interact with the cake without damaging the structure.
- Hidden Messages: Write a secret message or name on the underside of the cake board, visible only when the cake is lifted. It’s a fun surprise for the recipient!
Final Presentation Tips
Presentation is just as important as execution. Follow these tips to ensure your Dragon Themed Cake makes a grand entrance:
- Height Matters: Elevate the cake on a pedestal or riser to draw attention and emphasize its size and intricacy.
- Thematic Decorations: Surround the cake with themed props, such as fairy lights, faux ivy, or miniature figurines, to enhance the fantasy atmosphere.
- Photography Setup: Before slicing the cake, set up a dedicated photo area with good lighting and a complementary backdrop. Capture close-ups of the dragon’s details and wide shots of the entire cake for social media sharing or personal keepsakes.
Conclusion: Unleash Your Inner Artist with a Dragon Themed Cake
Creating a Dragon Themed Cake is more than just baking—it’s an opportunity to unleash your inner artist and immerse yourself in a world of imagination. From planning and preparation to baking and decorating, each step brings you closer to crafting a show-stopping masterpiece that captures the essence of these legendary creatures.
While the process may seem daunting at first, breaking it down into manageable stages makes it accessible to bakers of all skill levels. Remember, there’s no right or wrong way to design your cake; let your creativity guide you and don’t be afraid to experiment. Whether you opt for a bold, fiery dragon or a whimsical, colorful creation, the joy lies in bringing your vision to life.
So roll up your sleeves, gather your tools, and embark on this enchanting journey. With dedication and passion, you’ll soon have a stunning Dragon Themed Cake that delights and inspires everyone who sees it. Happy baking!